Installation guide · Texas
Water Softener Installation: What to Expect Before, During, and After
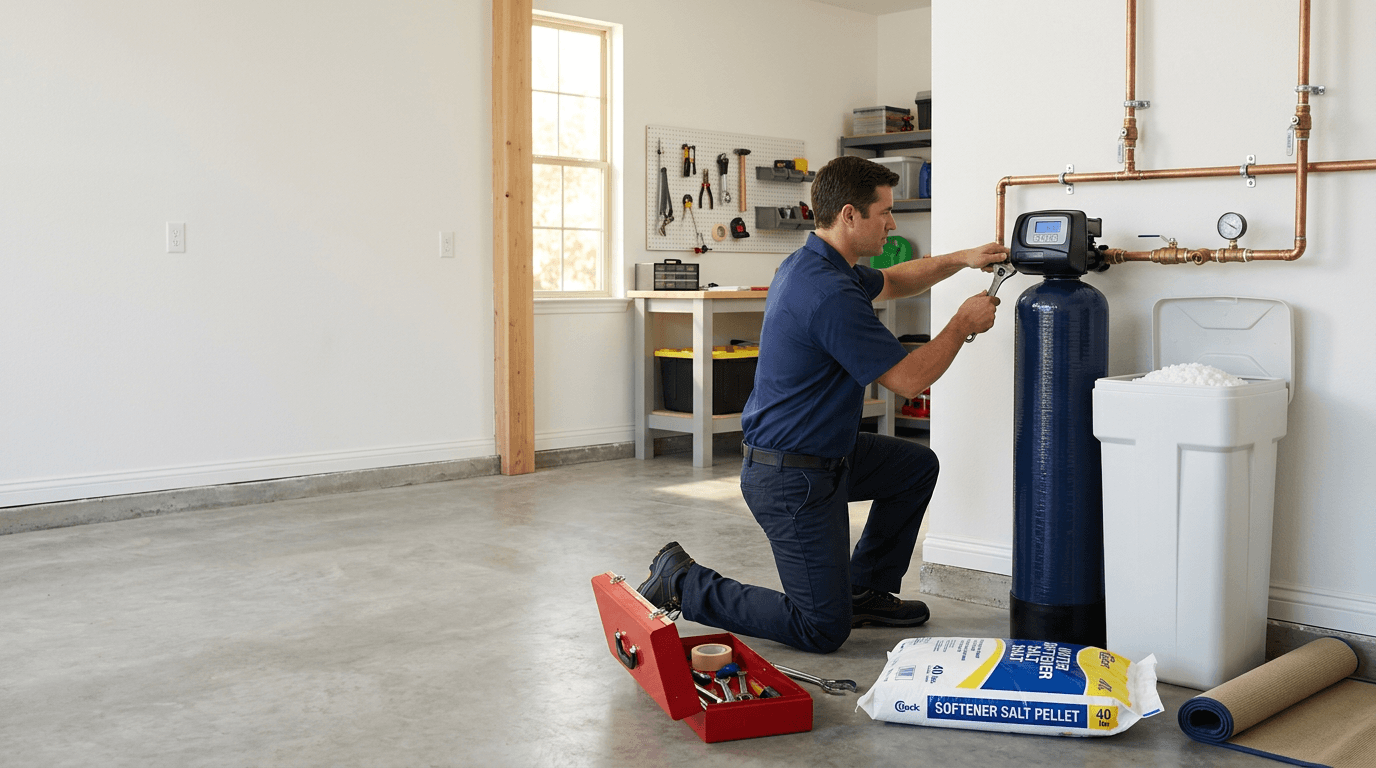
Professional water softener installation typically takes 2 to 4 hours for a straightforward residential setup — connecting the main line and drain, programming, and testing.
Updated 13 min read
Quick answer · Typical installation times
1–3 hours
Replacing an existing water softener
2–4 hours
New install with existing plumbing connections
4–8+ hours
Installation requiring a new plumbing loop
The process usually involves connecting the system to your home’s main water supply, installing a drain connection, programming the equipment, and testing the water to confirm the softener is working correctly. Some installations take longer, especially when a home doesn’t have existing water softener connections or requires additional plumbing work.
If you’re considering installing a water softener, knowing what happens before, during, and after installation can help you prepare your home, understand the costs, and avoid common problems. Whether you’re installing your first system or replacing an older unit, here’s what homeowners should expect.
Installation-day checklist
The whole process at a glance — each phase is covered in detail below.
How Does Water Softener Installation Work?
A whole-house water softener is generally installed where your home’s water supply enters the plumbing system, before water is distributed to the fixtures that need softened water. The system uses a process called ion exchange to reduce calcium and magnesium, the minerals responsible for hard water.
A typical salt-based water softener includes several components:
- Resin tank: Contains the material that removes hardness minerals.
- Brine tank: Stores salt used during regeneration.
- Control valve: Manages water flow and regeneration cycles.
- Bypass valve: Allows water to bypass the equipment when necessary.
- Drain connection: Carries wastewater away during regeneration.
- Electrical connection: Powers the controls on systems that require electricity.
During installation, these components are connected to your home’s plumbing and configured for your household’s water conditions. The goal is to provide softened water throughout the appropriate portions of your home without restricting normal water usage.
How Long Does Water Softener Installation Take?
For many homes, installation can be completed in a single visit. The exact time depends on the existing plumbing, equipment type, and whether additional connections are necessary.
| Installation type | Estimated time |
|---|---|
| Replacing an existing water softener | 1–3 hours |
| New installation with existing plumbing connections | 2–4 hours |
| Installation requiring a new plumbing loop | 4–8 hours or longer |
| Complex installation with additional water treatment | Varies by project |
These are typical planning estimates, not guaranteed installation times. Older plumbing, restricted access, electrical work, and permitting requirements may extend the project.
A home with a pre-installed water softener loop is usually easier to work with than a property requiring modifications to the main water line. You should also expect your household water supply to be temporarily shut off while plumbing connections are made. The installer can explain the anticipated interruption before beginning work.
Before Installation: How to Prepare Your Home
A little preparation can make installation day easier and help prevent unexpected complications. Here are the most important things to do before your appointment.
1. Have your water hardness tested
Before purchasing a water softener, determine how hard your water actually is. Water hardness is usually measured in grains per gallon (GPG) or milligrams per liter (mg/L). Higher hardness levels generally mean the softener must remove more minerals from the same amount of water. Testing helps determine the appropriate equipment capacity and programming settings.
For example, a family of four with water measuring 8 GPG may need a different system than a similar household with water measuring 20 GPG. Without accurate hardness information, you risk choosing equipment that’s poorly matched to your home. If you’re uncertain which capacity to purchase, read our guide, What Size Water Softener Do I Need?
2. Choose an appropriate installation location
Most whole-house water softeners are installed near the home’s main water supply. Common locations include:
- Garages
- Utility rooms
- Dedicated equipment closets
- Basements, where available
- Suitable exterior locations when the equipment is designed and protected for outdoor conditions
In Texas, garages are a common location because they may provide convenient access to the main water line. The chosen area needs enough space for the equipment, access for maintenance, and appropriate plumbing connections. Traditional salt-based systems also generally require a suitable drain and an electrical outlet for the control valve. Follow the manufacturer’s requirements for clearance, temperatures, drainage, and electrical supply.
3. Check whether your home has a water softener loop
A water softener loop is a plumbing connection intended to simplify the installation of water treatment equipment. Some newer homes already have one installed. If your home has a suitable loop, the installation may require less plumbing work. If it doesn’t, the installer may need to modify the main water line to connect the softener. This can increase labor costs and extend the installation time.
Before your appointment, mention whether you already have a water softener or any visible plumbing connections intended for treatment equipment.
4. Clear the installation area
Make sure the installer can access the equipment location safely. Move stored boxes, tools, vehicles, or other items that may block access to the main water line. You’ll also want to leave enough room around the equipment for future maintenance. Remember that a salt-based water softener requires periodic salt refills — a location that’s difficult to reach may become inconvenient over time.
5. Plan for a temporary water shutoff
During installation, the home’s main water supply may need to be shut off. The interruption is typically shorter than the entire appointment, but the timing depends on the plumbing work. Before the appointment:
- Complete any necessary laundry or dishwashing.
- Fill drinking-water containers if needed.
- Avoid scheduling water-intensive activities during the installation.
- Make arrangements for anyone who requires uninterrupted water access.
Ask your installer how long they expect the water to be unavailable.
During Installation: What Happens Step by Step?
Although installation procedures vary by manufacturer and property, most residential water softeners follow a similar process.
Step 1: Inspect the plumbing and confirm placement
The installer begins by evaluating the location and confirming that the equipment can be connected properly. This may include checking the main shutoff valve, water pressure, available plumbing connections, drain location, electrical access, and equipment clearance. The installer should also verify that the water softener is appropriately sized for your household. If unexpected plumbing problems are discovered, they should be explained before additional work is performed.
Step 2: Shut off the water supply
Before connecting the equipment, the water supply is shut off and pressure is relieved from the affected plumbing. The installation may involve connecting to an existing loop or modifying the plumbing to create an appropriate connection. The work must comply with applicable plumbing requirements and the equipment manufacturer’s instructions.
Step 3: Connect the water softener to the main water line
Next, the softener is connected to the plumbing so water enters and exits through the correct connections. Most systems also use a bypass valve, which allows water to flow around the softener when the equipment needs maintenance or service. A properly installed bypass can make future repairs much easier.
Depending on your plumbing layout, the installer may also arrange for outdoor irrigation or other water uses that don’t require softened water to bypass the system. This helps avoid unnecessary treatment of water used for landscaping.
Step 4: Install the drain connection
Salt-based water softeners periodically regenerate their resin to maintain hardness-removal capacity. During regeneration, the system uses a brine solution and discharges wastewater, which must be directed to an appropriate drain — a floor drain, suitable standpipe, or another approved drainage arrangement.
An appropriate air gap is commonly required to help prevent wastewater from flowing backward into the treatment equipment. The drain connection must follow local plumbing requirements and the manufacturer’s instructions. A water softener should never be connected to an unsuitable drain simply because it’s nearby.
Step 5: Connect the brine tank and add salt
The brine tank stores the salt used for regeneration. Once the plumbing is connected, the installer prepares the brine system according to the manufacturer’s instructions. This may include adding a specified amount of water and the appropriate type of softener salt.
Not all systems have identical startup procedures. Some manufacturers recommend particular salt types or initial tank levels. Follow the equipment documentation rather than assuming every water softener is set up the same way.
Step 6: Program the water softener
Modern water softeners typically use programmable controls. The installer may configure settings such as:
- Incoming water hardness
- Time of day
- Regeneration settings
- Household water usage assumptions
- Reserve capacity
- Manufacturer-specific operating parameters
Proper programming is important because it affects how frequently the system regenerates and how efficiently it uses salt and water. Demand-initiated systems can adjust regeneration based on actual water use rather than relying exclusively on a fixed schedule. The EPA recommends demand-initiated regeneration as a more water-efficient approach.
Step 7: Start the system and test its operation
After installation, the water supply is restored and the softener is started according to its manufacturer’s instructions. Startup procedures may include flushing the equipment, filling the resin tank, running a regeneration cycle, and verifying the drain operation.
The installer should inspect connections for leaks and confirm the system is operating correctly. Water hardness may be tested before and after treatment to verify performance. Once startup is complete, the system can be placed into normal service.
After Installation: What Should You Expect?
Once your water softener is installed, you may notice some immediate differences. Other changes may take longer, especially when existing hard water is still inside your home’s water heater.
Your cold water may soften before your hot water
When a water softener begins operating correctly, water flowing through the treated cold-water lines can become softened relatively quickly. However, your water heater may still contain water that entered before the softener was installed. That water must be used and replaced before the full effect is noticeable at hot-water fixtures. How long this takes depends on your water heater’s capacity and household usage.
You generally don’t need to drain your water heater simply to begin using a new softener unless there is a separate maintenance reason or manufacturer recommendation.
Soap may lather differently
One of the first changes homeowners notice is how soap behaves in softened water. Hardness minerals interfere with soap performance and contribute to soap scum. With those minerals reduced, soaps and detergents can lather more effectively. You may discover that you don’t need as much detergent or shampoo to achieve the same results — start by following product directions and adjusting as appropriate.
Water may feel different on your skin
Some homeowners describe softened water as feeling slippery. This sensation is related to how soap interacts with water that contains fewer hardness minerals. Hard water can leave soap residue on the skin, while softened water changes how soap lathers and rinses. The difference may take a little getting used to, but it doesn’t mean the softener is malfunctioning.
Existing mineral deposits won’t disappear overnight
A water softener helps reduce new hardness-related scale formation. However, it doesn’t instantly remove years of buildup from faucets, shower doors, water heaters, or plumbing. Existing deposits may still require cleaning or maintenance. Over time, reducing hardness can help limit additional scale accumulation in the parts of your home receiving softened water.
Your First Week: What Should You Check?
A properly installed water softener should require relatively little daily attention. Still, the first week is a good time to become familiar with the equipment.
| What to check | What to look for |
|---|---|
| Plumbing connections | No visible leaks or dripping |
| Water pressure | No unusual reduction in flow |
| Control display | Normal operation and no error messages |
| Brine tank | Appropriate salt level |
| Drain connection | No leaks or overflow during regeneration |
| Water hardness | Treated-water reading consistent with expected performance |
If you experience persistent low water pressure, visible leaks, unusual drain discharge, or continued hardness problems, contact the installer. A properly installed system should operate according to its manufacturer’s specifications without requiring constant adjustments.
How to Maintain Your Water Softener After Installation
Regular maintenance helps keep the equipment working efficiently. Most homeowners can perform basic maintenance without extensive plumbing knowledge.
Check the salt level regularly
Traditional salt-based water softeners require salt to regenerate their resin. How frequently you need to add salt depends on household water usage, hardness, and equipment settings. Check the brine tank periodically, such as monthly, and refill it according to the manufacturer’s recommendations. Avoid letting the tank run out of salt.
Watch for salt bridges
A salt bridge is a hardened layer of salt that forms above an empty space inside the brine tank. This can prevent the system from properly dissolving salt for regeneration. If the tank appears full but your water becomes hard again, a salt bridge may be one possible cause. Follow the manufacturer’s instructions for safely identifying and correcting the problem.
Keep the brine tank clean
Salt residue and sediment can accumulate inside the brine tank. The EPA recommends periodic brine tank cleaning, including annual cleaning as a general maintenance practice. Follow the schedule appropriate for your equipment and water conditions.
Schedule periodic service
The EPA also recommends professional servicing approximately once per year. A maintenance visit may include checking the system’s regeneration settings, verifying water hardness, inspecting components, and evaluating overall performance. Regular attention can help identify problems before they become more expensive repairs.
How Much Does Water Softener Installation Cost?
For a standard professionally installed residential salt-based water softener, homeowners can use approximately $1,200 to $3,800 as a general planning range, including equipment. Your actual quote may be lower or higher.
Factors influencing the price include the equipment model, capacity, existing plumbing, installation location, and any additional work required. A home with a water softener loop may cost less to equip than a home requiring new plumbing connections. For a more detailed breakdown, see our article, How Much Does Water Softener Installation Cost in Texas?
Before accepting an estimate, confirm whether it includes equipment, labor, fittings, startup, testing, and any required permits.
Do You Need a Licensed Professional to Install a Water Softener in Texas?
Texas regulates certain water treatment installation activities through the Texas Commission on Environmental Quality (TCEQ). For covered work performed under contract, individuals generally need an appropriate Water Treatment Specialist license unless an exemption applies.
- A Class II Water Treatment Specialist is qualified under TCEQ rules to perform specified water treatment installations and servicing.
- Licensed plumbers are exempt from the separate Water Treatment Specialist licensing requirement.
- Some private well systems are outside the scope of these particular TCEQ water treatment specialist rules, although other requirements may still apply.
- Additional plumbing work and local permit requirements must also be considered.
Hiring someone solely because they advertise water softener installation isn’t enough to establish whether they’re properly qualified for the specific work. Before scheduling, ask who will perform it, which credentials apply, and whether any permits or additional licensed trades are required. For official licensing information, visit the Texas Commission on Environmental Quality.
Should You Install a Water Softener Yourself?
Some homeowners consider DIY installation to save money. Certain manufacturers provide equipment designed for relatively straightforward installation when appropriate plumbing connections already exist.
However, installing a water softener can involve modifying potable water piping, establishing a proper drain connection, and ensuring the equipment complies with local requirements. Mistakes can result in leaks, drainage problems, poor performance, or damage to surrounding property.
Professional installation may be particularly worthwhile if your home lacks a softener loop, has older plumbing, or requires substantial modification. It also provides an opportunity to have the equipment properly sized, programmed, and tested. If you’re considering doing the work yourself, check applicable local requirements and review the full manufacturer installation manual before beginning.
Common Water Softener Installation Mistakes to Avoid
Even a quality water softener can underperform if it’s installed incorrectly. Common problems include:
- Selecting equipment based only on household size without accounting for actual water hardness
- Installing a system with insufficient service flow capacity for the home’s fixtures
- Incorrect inlet and outlet connections
- Poorly routed drain lines
- Inadequate equipment clearance
- Improper regeneration settings
It’s also important to consider what water actually needs softening. Routing large amounts of outdoor irrigation water through a softener can waste treatment capacity when soft water isn’t needed for landscaping. A careful installation assessment should address these details before work begins.
If you also have a separate water quality concern, read Water Softener and Filtration Combo: Is It Worth Buying Both?
Frequently Asked Questions About Water Softener Installation
How long does it take to install a water softener?
Most straightforward professional installations take approximately 2 to 4 hours. Replacing an existing unit may take less time, while adding new plumbing connections can extend the project to most of a day or longer.
Will my water be turned off during installation?
Usually, yes. The installer typically needs to shut off the household water supply temporarily while connecting the softener. The shutdown generally lasts for only part of the installation appointment.
Can a water softener be installed in the garage?
Yes. Garages are common installation locations when they provide suitable plumbing, drainage, electrical access, and protection from freezing or excessive heat. The equipment manufacturer’s installation requirements should determine whether the location is appropriate.
How soon will I have soft water after installation?
Properly installed and started systems can begin supplying softened water relatively quickly. However, hot water may take longer to reflect the change because your water heater may still contain previously untreated water.
Does a water softener need electricity?
Most modern automatic salt-based water softeners require electrical power for their control valves. Some specialized or non-electric models operate differently. Check the requirements for your specific equipment.
Does a water softener need a drain?
Most conventional salt-based water softeners require an appropriate drain connection because regeneration produces wastewater. The drain must be installed according to the manufacturer’s instructions and applicable plumbing requirements.
Should I install a water filter with my softener?
Only if your water conditions justify additional treatment. A water softener primarily addresses hardness, while filtration systems target different water quality concerns. If you have hard water and a separate filtration concern, a combination may make sense.
Can I drink water after installing a water softener?
A properly installed softener is not intended to make unsafe water safe. It primarily reduces hardness minerals. Traditional sodium-regenerated softeners also add some sodium to treated water. Homeowners who need to limit sodium intake should discuss drinking-water options with an appropriate healthcare professional.
If you’re concerned about other contaminants, water testing can help determine whether additional treatment is necessary.
Will installing a water softener lower my water pressure?
A properly sized and installed system should be designed to maintain adequate water flow for the household. However, any treatment equipment creates some pressure loss, and an undersized unit or plumbing restriction can make the problem noticeable. Ask the installer to verify that the system’s service flow rating is appropriate for your home.
The Bottom Line: What to Expect From Water Softener Installation
Water softener installation is generally a manageable home improvement project when the equipment and plumbing are properly planned. For many homeowners, the installation itself takes only a few hours. The process includes evaluating the water supply, connecting the system to the plumbing, establishing appropriate drainage, configuring the controls, and confirming that the softener operates correctly. Afterward, routine salt refills and periodic maintenance help keep the equipment performing as intended.
The most important step is making sure the softener is properly sized and installed for your home’s actual water conditions. That helps you avoid unnecessary expenses, maintain appropriate water flow, and get the benefits you’re purchasing the system to provide.
Ready for Water Softener Installation? Get a Quote From Clearly Water Systems
Whether you’re replacing an older water softener or exploring your first whole-home system, knowing what your installation requires is the best place to start. At Clearly Water Systems, we believe homeowners should understand their water treatment options before making an investment. From water hardness and household size to plumbing requirements and equipment selection, the right information helps you make a confident decision.
Last reviewed: November 2026. Installation times and costs are general planning estimates. Actual requirements depend on equipment, plumbing conditions, manufacturer instructions, and applicable state and local regulations.
Sources and further reading
- Texas Commission on Environmental Quality — Water Treatment Specialist Licensing
- EPA WaterSense — Home Maintenance
- EPA WaterSense — Cation Exchange Water Softeners
- NSF — NSF/ANSI 44 Residential Cation Exchange Water Softeners
- CDC — About Home Water Treatment Systems
- Whirlpool Water Solutions — How to Install a Water Softener
- Culligan — What to Expect at Your Water Softener Installation